Lacing blocks
Have you made your buttons, yet?Not that you necessarily need to have buttons made yet... you do need to know what your buttons will look like, particularly what size you're going to use . You might want to take a look at Making Buttons before you continue.
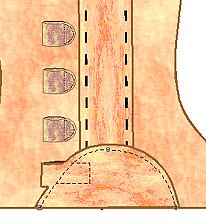 Lacing blocks are not difficult to apply, just tedious. What needs explanation is the
spacing. I agonized over this on the first few pairs, and sometimes
still don't get it quite right. You see, if you go too far forward on the boot
(or if you lose weight in your legs), the buttons and blocks will touch when the boot is
laced.
Lacing blocks are not difficult to apply, just tedious. What needs explanation is the
spacing. I agonized over this on the first few pairs, and sometimes
still don't get it quite right. You see, if you go too far forward on the boot
(or if you lose weight in your legs), the buttons and blocks will touch when the boot is
laced.
My solution: most legs aren't large enough to justify moving the lacing blocks forward, so I always put them tight against the foxing.
Vertical spacing isn't really that difficult. I like 3/4", 1" max. "But Bill," you might say, "won't that put a lot of buttons up my leg? Wouldn't it be better to space them, say, button - botton block - button - button block...with the blocks a button's width apart?"
No. Put them close. If they're too far apart, you get an unsightly gap at the ankle and your socks will be visible. Closely spaced, that gap stays closed. Oh, and you'll get better ankle support.
