Attaching and Finishing the Sole
Believe it or not, we're almost finishedAttaching the sole is easy. Apply a coat of Barge® cement to both the leather sole and the Vibram™ sole (making the rather bold assumption that's what you're using), let the cement get tacky, then firmly press the two together. Get inside the boot and press everywhere you can get your fingers in to press. I even go so far as to bend the sole, to make sure the everywhere that needs to be touching does indeed touch.
If you feel you have the time and want to be really, really sure, let the Barge® dry completely and then apply another coat to both sides before pressing them together.
Now is when you'll see the beauty of having cut the rubber sole larger than its leather counterpart. Aligning the two when you've got all that boot hanging off the top is a little problematic...if you gave yourself the 'wiggle room' right up front, your life will be much happier now.
If you have clamps, use them. I like QuikClamps - they're easy to use and have rubberized faces. Two at the toes, two at the sides, one at the heel. Whether you use clamps or not, let the cement cure overnight. You might be anxious to get going on the final construction step (hell, after this the only thing left is to sew on the buttons), and you can, but you'll gunk up the sandpaper that much faster if all of the solvent hasn't evaporated out of the cement.
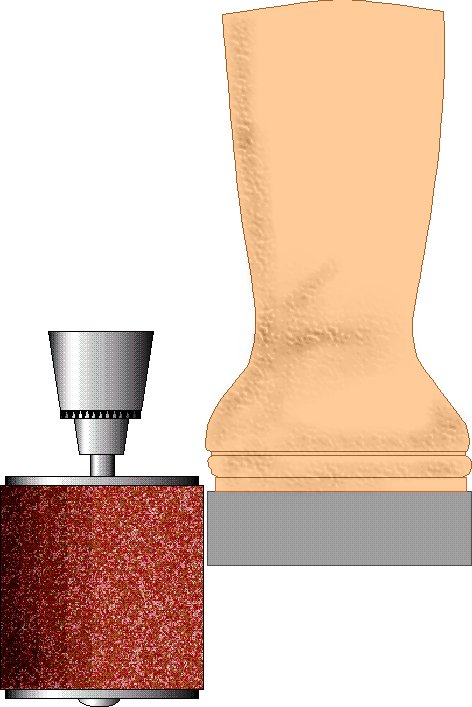 The last step almost requires the use of a drill press, or else mount a drill in a vice. Using a drum
sander, you now sand the rubber sole so that it is flush with the leather sole. If you've left enough of a margin
on the rubber sole, you can even sand to within an 1/8" of the leather sole. This gives a very professional
appearance but is much more difficult and looks like hell if it isn't consistant all the way around.
The last step almost requires the use of a drill press, or else mount a drill in a vice. Using a drum
sander, you now sand the rubber sole so that it is flush with the leather sole. If you've left enough of a margin
on the rubber sole, you can even sand to within an 1/8" of the leather sole. This gives a very professional
appearance but is much more difficult and looks like hell if it isn't consistant all the way around.
